POUR OVER BREW GUIDE
GET WITH THE GRIND
We need to break the whole beans down to let the coffee soak in all the water, and let the water get out all the yumminess. This is called grinding coffee, and different coffees need different grind sizes.The coarsest setting looks something like fancy flaked sea salt, the finest setting something like flour.
Helpfully, all grinders have numbers on them when changing grind sizes. Lower numbers indicate finer settings, higher numbers indicating coarser settings.
KINTO GRIND SETTING
So if the highest number is fancy sea salt, the lowest number something like flour—for a Kinto grind setting you want to be a little over halfway, at the start of the top third numbers. The grinds should look closer to table salt than fancy flaked sea salt.THE MAGIC’S IN THE MEASUREMENTS
There’s no point in making a delicious cup of coffee in the morning—then failing miserably the following morning.
So if you measure the amount of ground coffee you use, the amount of water you brew with, and how much water you pour—you’ll easily be able to repeat the magic each morning.
Scales are best for measuring both coffee and water. But you could also use a measuring cup for water and a levelled-off spoon for coffee. But when pouring water into your Kinto brewer, it’s best to weigh how much water you’re using as you brew (we’ll get to this though!).
It’s a 300ml carafe we’re pouring into (aiming for around 220ml in the final cup) so start with around 300ml of filtered water for rinsing and a little extra if you need it, and boil this in a kettle.
Stay away from tap water or bottled water from the supermarket—it’s complicated, but those kinds of waters are great to drink, but not so great to brew coffee with. Use filtered water from a domestic Brita filter or the like. You'll still get good coffee from tap water! But generally filtered water is best.
For the coffee, freshly grind 15g. While the beans are whole, they’re protecting the flavour inside from nasty stuff—like oxygen and that weird spice smell down the back of your pantry. Pre-ground coffee is not bad at all though—you’re probably just going to notice more flavour when you grind fresh (a good reason to invest in a decent grinder).
PRE-BREW SET UP
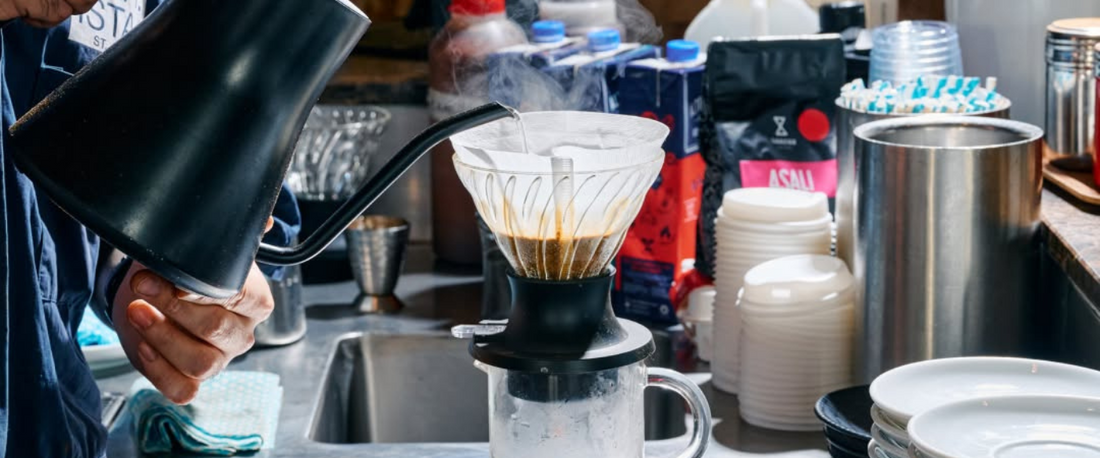
If you’ve bought our Kinto Brew Kit you’ll already have some Kinto filters—but given this is a V60 pourover style coffee, any filter labelled ‘V60’ or ‘pourover’ will do—just make sure they fold out like a cone.Place the filter inside the Kinto 2-cup brewer, pinching the folded line (where the filter connects one side to the other) down against the side of the filter—this will help the filter hold the cone shape.
If you haven’t measured out and started boiling your water, do that now, and once it’s boiled rinse out the filter while it’s sitting in the brewer—this will remove any ‘paper’ flavour from the filter, and pre-warm your carafe or mug. Empty this water out before you start brewing.
While the water is boiling also measure out your coffee and grind it, if you haven’t already. Pour the ground coffee into the filter while it’s sitting in the brewer, and gently shake it side to side to level the coffee off. It should look nice and even, like a putting green.
GET BREWING
Get your water boiling again.
This is an easy way to make sure your water is at the right temperature—there’s no messing about with temperature gauges or settings, you just need to make sure your water is boiling. Easy as.
Place your carafe/mug, brewer, filter, and coffee on some scales, zero it off, and start pouring the water in, aiming for 60g and trying to cover as much of the dry coffee as you can.
Count to 30 (or set a 30-second timer) then give the coffee grinds a good swirl—you’re aiming to make sure every last grain of coffee has some water touching it.
Now continue slowly pouring an additional 80g of water in, being sure to ‘rinse’ any coffee that’s ridden up the side of the cone.
At the 80g mark pause for a minute, letting the coffee soak in all the water and the water start extracting out all the yumminess.
After a minute, pour the final 80g in aiming for a complete drawdown in around 2 ½ minutes. ‘Complete drawdown’ means all the water has passed through the coffee grinds and has stopped pouring out the bottom into the carafe/mug.
Give the carafe or mug a good swirl, take another deep breath of contentment, then pour and enjoy.
TIPS
If the brew takes longer than 2 ½ minutes, then you’ve ground the coffee too fine—go a notch or two coarser. If the brew takes less than 2 ½ minutes, you’ve gone to coarse—go a notch or two finer.
If you’re using pre-ground coffee and the brew takes longer than 2 ½ minutes—use a little less ground coffee next time. If the brew takes less than 2 ½ minutes—use a little more ground coffee next time.
If you’re using either ground coffee or whole beans, and you find your coffee is too strong—then again use a little less ground coffee next time, or add more boiling water at the end.
If you find it’s too weak then use a little more ground coffee next time but use a little more water (you might also find your brew time is extended a little more—go coarser on the grind if this is the case).


